Bootstrap is the most popular and probably the most complete front-end web framework, which allows developers to fasten the creation of a website or web app.
In this article, I have compiled 5 ready-to-use web forms for your Bootstrap projects. It’s time to save some time!
General Rules for your Bootstrap Form
As the most popular CSS Framework available, Bootstrap makes HTML forms creation way easier and much faster.
The first thing to note is that Bootstrap provides three different layouts by default. Those layouts are:
- Vertical Form
- Inline Form
- Horizontal Form
Those three layouts can be seen and tested on Bootstrap’s website.
Before showcasing the Bootstrap forms examples, let’s keep in mind a few simple rules:
<input>,<textarea>, and<select>elements should all have the.form-controlCSS class added to them. This class is used for styling the form elements. Included are styles for general appearance, focus state, sizing, etc.- For optimal spacing, make sure to wrap form controls and labels with
<div class="form-group">
That’s it with the theory. We can now switch to practice and check out the bootstrap forms.
Vertical Login Form

A very basic form template that can be easily enhanced and modified to suit almost any need. Use it as a starting point for almost any kind of simple forms, such as login forms, contact forms, etc.
<form role="form">
  <div class="form-group">
    <label for="email">Email address:</label>
    <input type="email" class="form-control" id="email">
  </div>
  <div class="form-group">
    <label for="pwd">Password:</label>
    <input type="password" class="form-control" id="pwd">
  </div>
  <div class="checkbox">
    <label><input type="checkbox"> Remember me</label>
  </div>
  <button type="submit" class="btn btn-default">Submit</button>
</form>
Inline Form

Inline forms are widespread, especially when it comes to login forms. Look at the code below. Notice any change from the previous form? In fact the single difference between this code and the previous one is the .form-inline class added to the form HTML element.
<form class="form-inline" role="form">
  <div class="form-group">
    <label for="email">Email address:</label>
    <input type="email" class="form-control" id="email">
  </div>
  <div class="form-group">
    <label for="pwd">Password:</label>
    <input type="password" class="form-control" id="pwd">
  </div>
  <div class="checkbox">
    <label><input type="checkbox"> Remember me</label>
  </div>
  <button type="submit" class="btn btn-default">Submit</button>
</form>
→ Source: W3 Schools
Contact Form
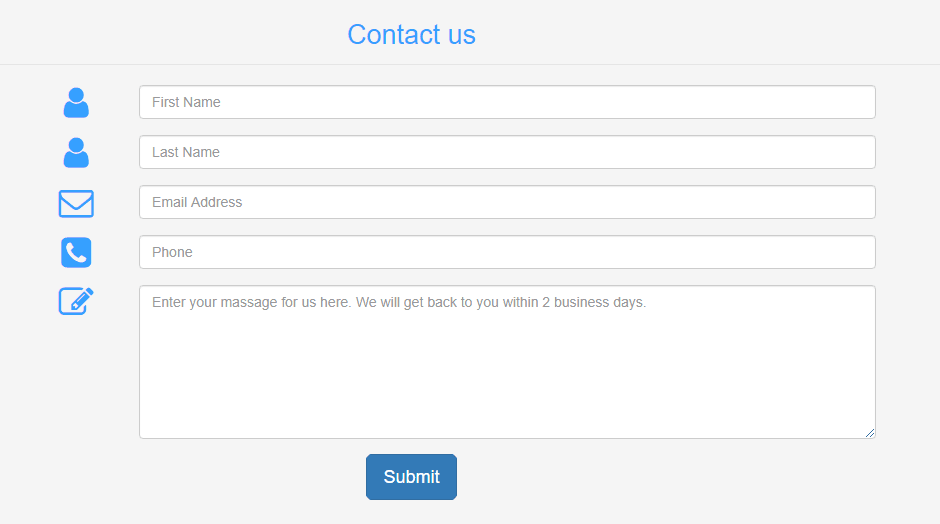
Contact forms are probably the most popular forms ever, as nearly every website features at least one. Here’s a quality template for all your contact form needs, plus a little CSS to make it look better. Also note that this example makes an interesting usage of Bootstrap’s glyphicons.
<div class="container">
    <div class="row">
        <div class="col-md-12">
            <div class="well well-sm">
                <form class="form-horizontal" method="post">
                    <fieldset>
                        <legend class="text-center header">Contact us</legend>

                        <div class="form-group">
                            <span class="col-md-1 col-md-offset-2 text-center"><i class="fa fa-user bigicon"></i></span>
                            <div class="col-md-8">
                                <input id="fname" name="name" type="text" placeholder="First Name" class="form-control">
                            </div>
                        </div>
                        <div class="form-group">
                            <span class="col-md-1 col-md-offset-2 text-center"><i class="fa fa-user bigicon"></i></span>
                            <div class="col-md-8">
                                <input id="lname" name="name" type="text" placeholder="Last Name" class="form-control">
                            </div>
                        </div>

                        <div class="form-group">
                            <span class="col-md-1 col-md-offset-2 text-center"><i class="fa fa-envelope-o bigicon"></i></span>
                            <div class="col-md-8">
                                <input id="email" name="email" type="text" placeholder="Email Address" class="form-control">
                            </div>
                        </div>

                        <div class="form-group">
                            <span class="col-md-1 col-md-offset-2 text-center"><i class="fa fa-phone-square bigicon"></i></span>
                            <div class="col-md-8">
                                <input id="phone" name="phone" type="text" placeholder="Phone" class="form-control">
                            </div>
                        </div>

                        <div class="form-group">
                            <span class="col-md-1 col-md-offset-2 text-center"><i class="fa fa-pencil-square-o bigicon"></i></span>
                            <div class="col-md-8">
                                <textarea class="form-control" id="message" name="message" placeholder="Enter your massage for us here. We will get back to you within 2 business days." rows="7"></textarea>
                            </div>
                        </div>

                        <div class="form-group">
                            <div class="col-md-12 text-center">
                                <button type="submit" class="btn btn-primary btn-lg">Submit</button>
                            </div>
                        </div>
                    </fieldset>
                </form>
            </div>
        </div>
    </div>
</div>
Associated CSS:
.header {
    color: #36A0FF;
    font-size: 27px;
    padding: 10px;
}

.bigicon {
    font-size: 35px;
    color: #36A0FF;
}
→ Source: PreBootstrap
Address Form
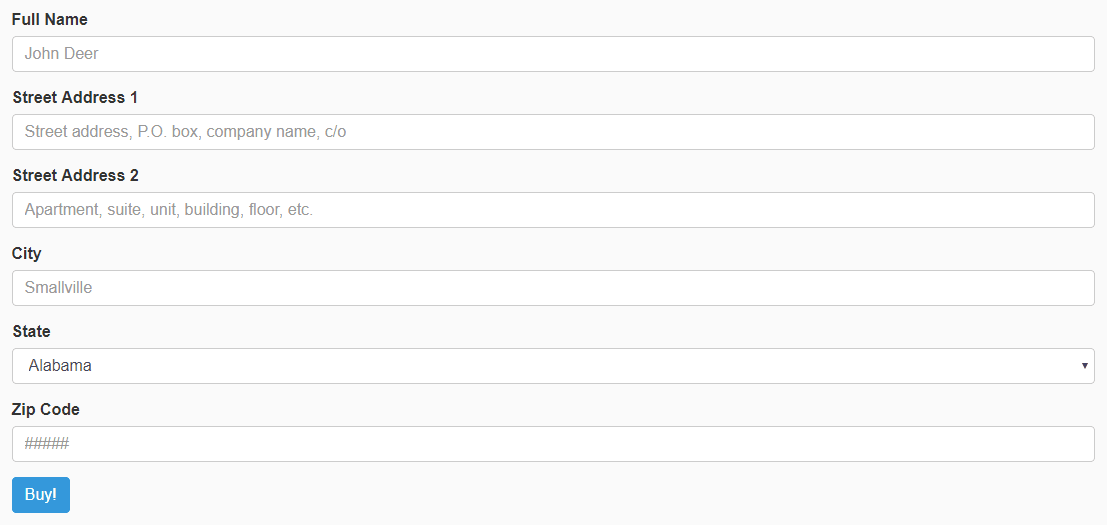
Here is a pretty complete form, featuring basically everything you need to collect a postal address from a (US) customer. Use it as it is or customize it as needed!
<form>

	<div class="form-group"> <!-- Full Name -->
		<label for="full_name_id" class="control-label">Full Name</label>
		<input type="text" class="form-control" id="full_name_id" name="full_name" placeholder="John Deer">
	</div>

	<div class="form-group"> <!-- Street 1 -->
		<label for="street1_id" class="control-label">Street Address 1</label>
		<input type="text" class="form-control" id="street1_id" name="street1" placeholder="Street address, P.O. box, company name, c/o">
	</div>

	<div class="form-group"> <!-- Street 2 -->
		<label for="street2_id" class="control-label">Street Address 2</label>
		<input type="text" class="form-control" id="street2_id" name="street2" placeholder="Apartment, suite, unit, building, floor, etc.">
	</div>

	<div class="form-group"> <!-- City-->
		<label for="city_id" class="control-label">City</label>
		<input type="text" class="form-control" id="city_id" name="city" placeholder="Smallville">
	</div>

	<div class="form-group"> <!-- State Button -->
		<label for="state_id" class="control-label">State</label>
		<select class="form-control" id="state_id">
			<option value="AL">Alabama</option>
			<option value="AK">Alaska</option>
			<option value="AZ">Arizona</option>
			<option value="AR">Arkansas</option>
			<option value="CA">California</option>
			<option value="CO">Colorado</option>
			<option value="CT">Connecticut</option>
			<option value="DE">Delaware</option>
			<option value="DC">District Of Columbia</option>
			<option value="FL">Florida</option>
			<option value="GA">Georgia</option>
			<option value="HI">Hawaii</option>
			<option value="ID">Idaho</option>
			<option value="IL">Illinois</option>
			<option value="IN">Indiana</option>
			<option value="IA">Iowa</option>
			<option value="KS">Kansas</option>
			<option value="KY">Kentucky</option>
			<option value="LA">Louisiana</option>
			<option value="ME">Maine</option>
			<option value="MD">Maryland</option>
			<option value="MA">Massachusetts</option>
			<option value="MI">Michigan</option>
			<option value="MN">Minnesota</option>
			<option value="MS">Mississippi</option>
			<option value="MO">Missouri</option>
			<option value="MT">Montana</option>
			<option value="NE">Nebraska</option>
			<option value="NV">Nevada</option>
			<option value="NH">New Hampshire</option>
			<option value="NJ">New Jersey</option>
			<option value="NM">New Mexico</option>
			<option value="NY">New York</option>
			<option value="NC">North Carolina</option>
			<option value="ND">North Dakota</option>
			<option value="OH">Ohio</option>
			<option value="OK">Oklahoma</option>
			<option value="OR">Oregon</option>
			<option value="PA">Pennsylvania</option>
			<option value="RI">Rhode Island</option>
			<option value="SC">South Carolina</option>
			<option value="SD">South Dakota</option>
			<option value="TN">Tennessee</option>
			<option value="TX">Texas</option>
			<option value="UT">Utah</option>
			<option value="VT">Vermont</option>
			<option value="VA">Virginia</option>
			<option value="WA">Washington</option>
			<option value="WV">West Virginia</option>
			<option value="WI">Wisconsin</option>
			<option value="WY">Wyoming</option>
		</select>
	</div>

	<div class="form-group"> <!-- Zip Code-->
		<label for="zip_id" class="control-label">Zip Code</label>
		<input type="text" class="form-control" id="zip_id" name="zip" placeholder="#####">
	</div>

	<div class="form-group"> <!-- Submit Button -->
		<button type="submit" class="btn btn-primary">Buy!</button>
	</div>

</form>
→ Source: Formden.com
Credit Card Form
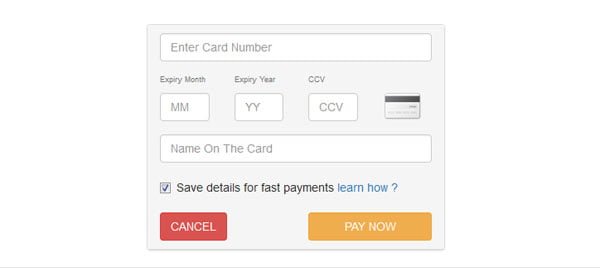
Now, here is another useful form, allowing visitors to communicate their credit card number. Please keep in mind that this is only the HTML interface, credit card forms need serious back-end validation.
<form action="#" class="credit-card-div">
<div class="panel panel-default" >
 <div class="panel-heading">

      <div class="row ">
              <div class="col-md-12">
                  <input type="text" class="form-control" placeholder="Enter Card Number" />
              </div>
          </div>
     <div class="row ">
              <div class="col-md-3 col-sm-3 col-xs-3">
                  <span class="help-block text-muted small-font" > Expiry Month</span>
                  <input type="text" class="form-control" placeholder="MM" />
              </div>
         <div class="col-md-3 col-sm-3 col-xs-3">
                  <span class="help-block text-muted small-font" >  Expiry Year</span>
                  <input type="text" class="form-control" placeholder="YY" />
              </div>
        <div class="col-md-3 col-sm-3 col-xs-3">
                  <span class="help-block text-muted small-font" >  CCV</span>
                  <input type="text" class="form-control" placeholder="CCV" />
              </div>
         <div class="col-md-3 col-sm-3 col-xs-3">
<img src="assets/img/1.png" class="img-rounded" />
         </div>
          </div>
     <div class="row ">
              <div class="col-md-12 pad-adjust">

                  <input type="text" class="form-control" placeholder="Name On The Card" />
              </div>
          </div>
     <div class="row">
<div class="col-md-12 pad-adjust">
    <div class="checkbox">
    <label>
      <input type="checkbox" checked class="text-muted"> Save details for fast payments <a href="#"> learn how ?</a>
    </label>
  </div>
</div>
     </div>
       <div class="row ">
            <div class="col-md-6 col-sm-6 col-xs-6 pad-adjust">
                 <input type="submit"  class="btn btn-danger" value="CANCEL" />
              </div>
              <div class="col-md-6 col-sm-6 col-xs-6 pad-adjust">
                  <input type="submit"  class="btn btn-warning btn-block" value="PAY NOW" />
              </div>
          </div>

                   </div>
              </div>
</form>
Associated CSS code:
<style>
.credit-card-div  span { padding-top:10px; }
.credit-card-div img { padding-top:30px; }
.credit-card-div .small-font { font-size:9px; }
.credit-card-div .pad-adjust { padding-top:10px; }
</style>
Stylish Registration Form
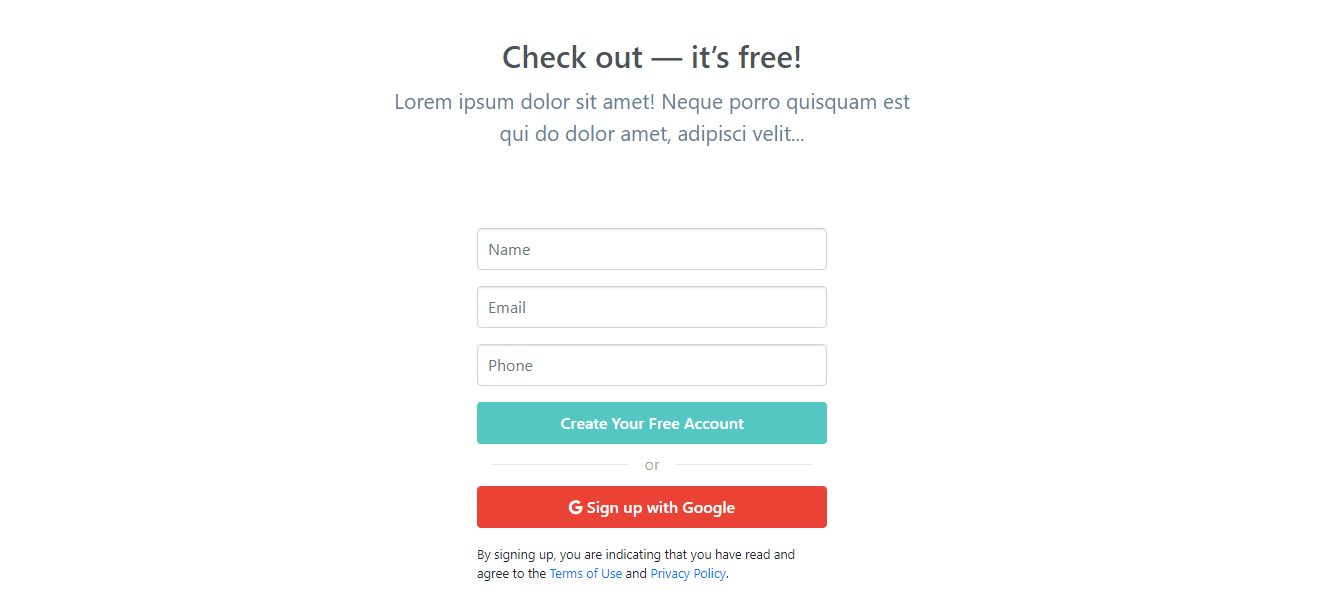
Let’s finish this round-up with a stylish and modern form for handling registrations. This clean and adaptable form will fit any kind of website.
<div class="container">
  <div class="col-md-6 mx-auto text-center">
	 <div class="header-title">
		<h1 class="wv-heading--title">
		   Check out — it’s free!
		</h1>
		<h2 class="wv-heading--subtitle">
		   Lorem ipsum dolor sit amet! Neque porro quisquam est qui do dolor amet, adipisci velit...
		</h2>
	 </div>
  </div>
  <div class="row">
	 <div class="col-md-4 mx-auto">
		<div class="myform form ">
		   <form action="" method="post" name="login">
			  <div class="form-group">
				 <input type="text" name="name"  class="form-control my-input" id="name" placeholder="Name">
			  </div>
			  <div class="form-group">
				 <input type="email" name="email"  class="form-control my-input" id="email" placeholder="Email">
			  </div>
			  <div class="form-group">
				 <input type="number" min="0" name="phone" id="phone"  class="form-control my-input" placeholder="Phone">
			  </div>
			  <div class="text-center ">
				 <button type="submit" class=" btn btn-block send-button tx-tfm">Create Your Free Account</button>
			  </div>
			  <div class="col-md-12 ">
				 <div class="login-or">
					<hr class="hr-or">
					<span class="span-or">or</span>
				 </div>
			  </div>
			  <div class="form-group">
				 <a class="btn btn-block g-button" href="#">
				 <i class="fa fa-google"></i> Sign up with Google
				 </a>
			  </div>
			  <p class="small mt-3">By signing up, you are indicating that you have read and agree to the <a href="#" class="ps-hero__content__link">Terms of Use</a> and <a href="#">Privacy Policy</a>.
			  </p>
		   </form>
		</div>
	 </div>
  </div>
</div>
Here is the associated CSS, providing additional styling to the form:
.send-button{
	background: #54C7C3;
	width:100%;
	font-weight: 600;
	color:#fff;
	padding: 8px 25px;
}
input[type=number]::-webkit-inner-spin-button,
input[type=number]::-webkit-outer-spin-button {
	-webkit-appearance: none;
	margin: 0;
}
.g-button{
	color: #fff !important;
	border: 1px solid #EA4335;
	background: #ea4335 !important;
	width:100%;
	font-weight: 600;
	color:#fff;
	padding: 8px 25px;
}
.my-input{
	box-shadow: inset 0 1px 2px rgba(0, 0, 0, 0.1);
	cursor: text;
	padding: 8px 10px;
	transition: border .1s linear;
}
.header-title{
	margin: 5rem 0;
}
h1{
	font-size: 31px;
	line-height: 40px;
	font-weight: 600;
	color:#4c5357;
}
h2{
	color: #5e8396;
	font-size: 21px;
	line-height: 32px;
	font-weight: 400;
}
.login-or {
	position: relative;
	color: #aaa;
	margin-top: 10px;
	margin-bottom: 10px;
	padding-top: 10px;
	padding-bottom: 10px;
}
.span-or {
	display: block;
	position: absolute;
	left: 50%;
	top: -2px;
	margin-left: -25px;
	background-color: #fff;
	width: 50px;
	text-align: center;
}
.hr-or {
	height: 1px;
	margin-top: 0px !important;
	margin-bottom: 0px !important;
}
@media screen and (max-width:480px){
	h1{ font-size: 26px; }
	h2{ font-size: 20px; }
}
Bootstrap Forms FAQ

What is Bootstrap Form Group?
The .form-group class is used to add structure to a form in Bootstrap. It provides a flexible class that encourages proper grouping of labels, controls, optional help text, and form validation messaging.
How can I Create a Horizontal Form in Bootstrap?
Simply add the .form-horizontal class to your <form> element, and the label class .control-label class to your <label> elements.
Which is the Default for a Form in Bootstrap?
Bootstrap defines the Vertical Form as default. Please check the examples above to see the CSS classes to add in order to create an inline or horizontal form.
How do I Add Bootstrap to my Project?
You need to add Bootstrap’s CSS to the <head> section of your HTML document. Please refer to the documentation for further info.
